Custom Notch Shape API
This API allows you to change the shape of the notches in command/c-blocks to whatever you wish. It can be used for clarifying custom types and systems!
You should have a decent knowledge of ScratchBlocks and SVG Paths to use this API.
Note that the name ScratchBlocks is mentioned, but ScratchBlocks is simply a custom modification of Blockly so that name also appears in some functions.
Making the shape
This tutorial uses SvgPathEditor since it's a good path editor for utility in PenguinMod.
Base path
The easiest way to make your notches is to start with an existing notch's path. You can easily get one of these by pasting one of these into the DevTools Console in your browser:
ScratchBlocks.BlockSvg.NOTCH_PATH_LEFTScratchBlocks.BlockSvg.NOTCH_SWITCH_PATH_LEFT
To copy the path, you just need to press enter (to get the output of the variable) and then right-click the output string and click "Copy string contents."
Importing the Base path
In SvgPathEditor you now want to paste the base path in the top left. Add m0 0 at the start and z at the end so the path is valid. Then, click "Convert to absolute" in the menu.
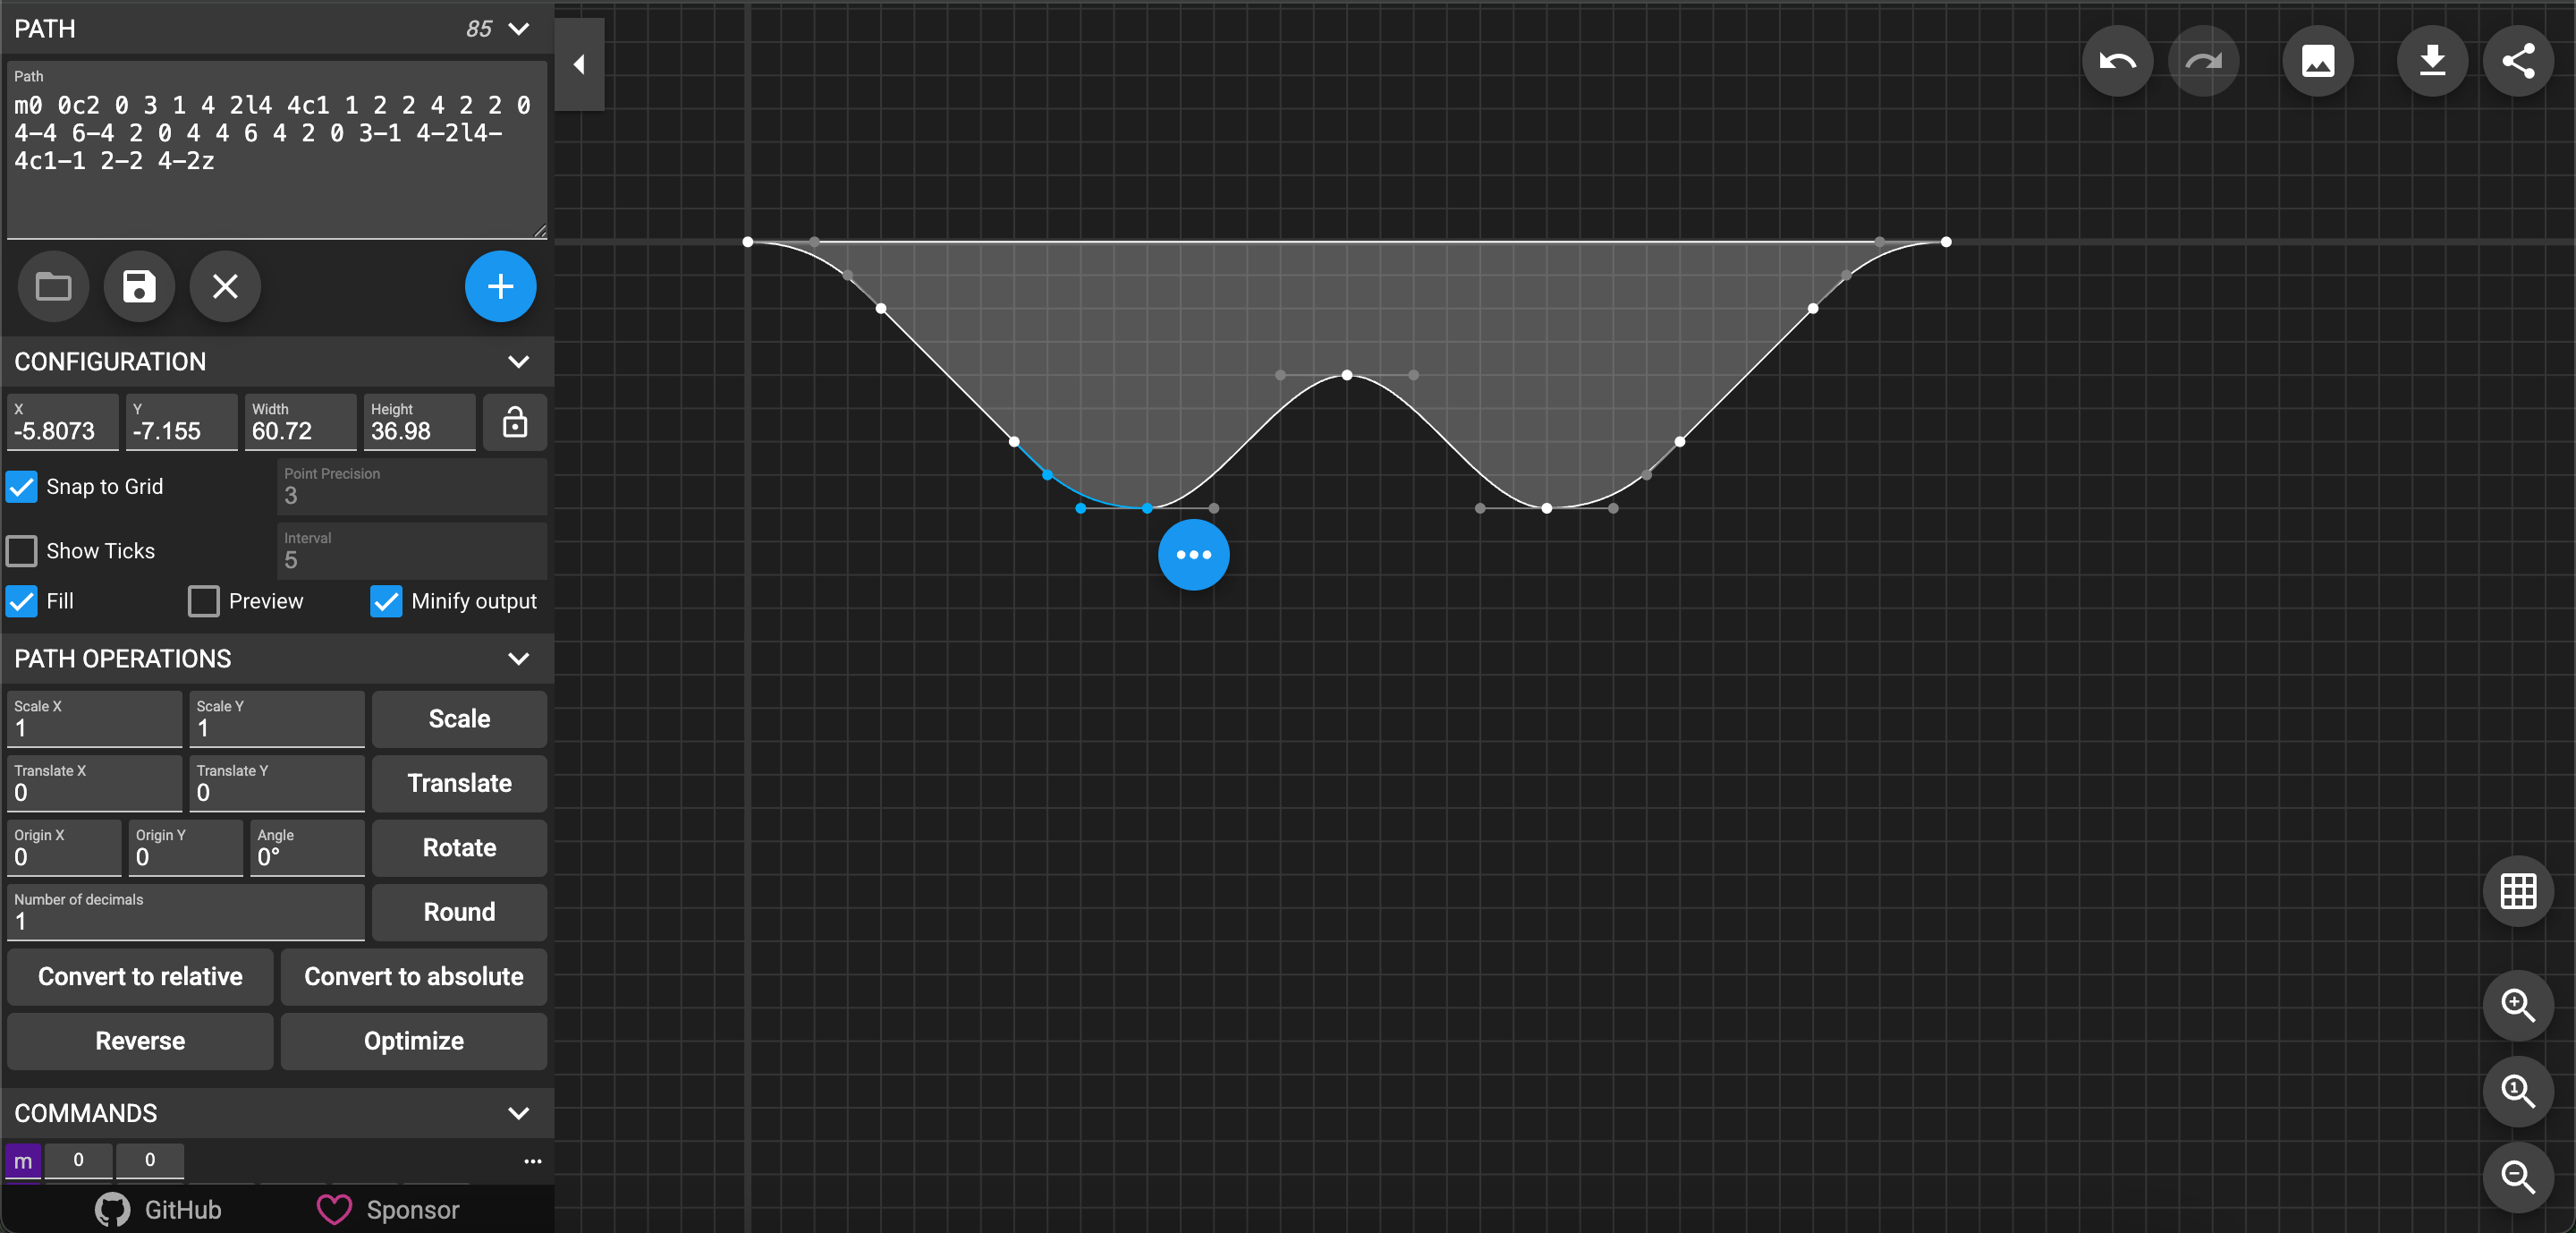
This is the easiest way to design the path since you won't be moving other parts of the path as much if they were kept relative.
Making the Notch
When making your notch, it is recommended to keep the size at a width of '36' and a height of '8'. This limit is set to prevent weird padding issues when connecting blocks.
Make sure you don't let the notch go past the center Y-axis line! Additionally, keep every svg path relative and not absolute.
Remove the starting m 0 0 and ending z, if present.
Defining the Notch
In order to make custom notch shapes, you first need to grab ScratchBlocks itself:
/* get ScratchBlocks if availiable... */
if (Scratch.gui) {
    Scratch.gui.getBlockly().then(ScratchBlocks => {
        // here you have access to ScratchBlocks safely
    });
}
Make sure you don't try to grab ScratchBlocks without checking for the GUI, since packaged projects will not have ScratchBlocks present.
You then need to use the ScratchBlocks.BlockSvg.registerCustomNotch function inside the then callback to register your shape:
Scratch.gui.getBlockly().then(ScratchBlocks => {
    ScratchBlocks.BlockSvg.registerCustomNotch("[EXTENSION ID]-[NOTCH NAME]", notchSVGPath);
});
The first argument to registerCustomNotch is the ID of your shape. This must be set to your extension's ID, then your notch's name, with a dash between.
An example would be myReallyCoolExtension-bumpyNotch. The extension ID is myReallyCoolExtension and the notch is a bumpyNotch.
Lastly, you need to provide the SVG path you made.
Using a Custom Notch in your Extension
Now that your notch is registered (with no errors), you can safely use the notch in your extension.
Make a Command/C-Block
In your extension's category, make a basic block:
blocks: [
    {
        opcode: 'myCoolNotch',
        text: 'bumpy notch',
        blockType: Scratch.BlockType.COMMAND,
    },
]
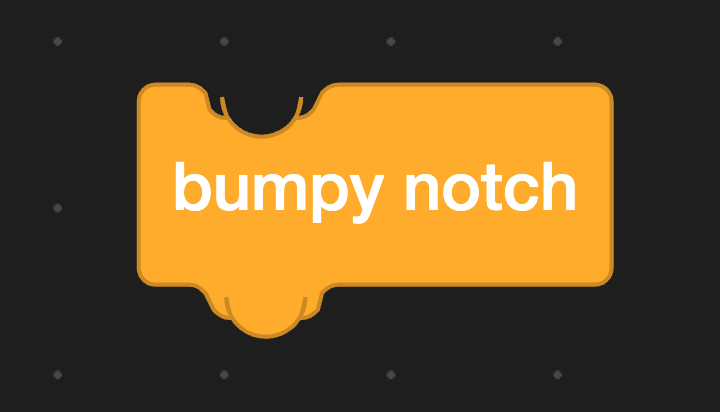
To give the outer notches our custom notch, we need to add the notchAccepts parameter:
{
    opcode: 'myCoolNotch',
    text: 'bumpy notch',
    blockType: Scratch.BlockType.COMMAND,
    notchAccepts: "myReallyCoolExtension-bumpyNotch"
},
To give the inner notches our custom notch, we need to add the notchAccepts parameter:
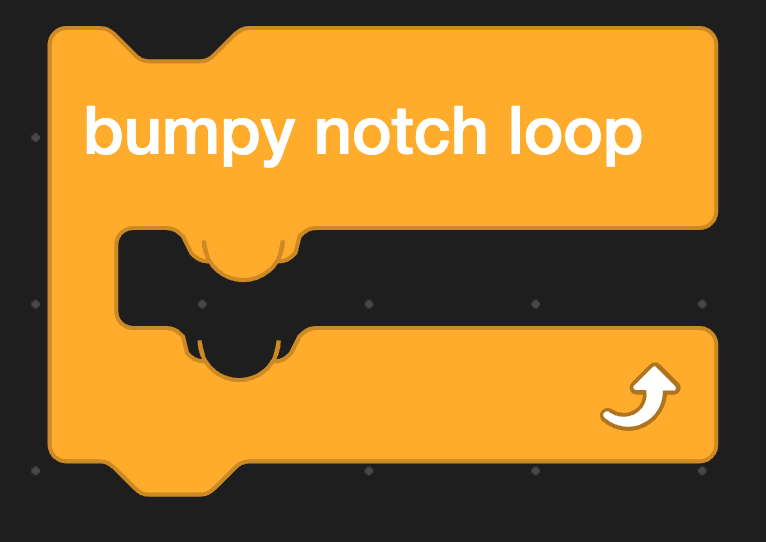
{
    opcode: 'myCoolNotchLoop',
    text: 'bumpy notch loop',
    blockType: Scratch.BlockType.LOOP,
    branchCount: 1,
    branches: [
      { accepts: "myReallyCoolExtension-bumpyNotch" },
    ],
},