Understanding the Code Editor
These docs are not completely finished yet. We're slowly working on expanding the documentation while we work on other things, so please be patient with us!
The code editor has lots of individual parts that can be named, seen below:
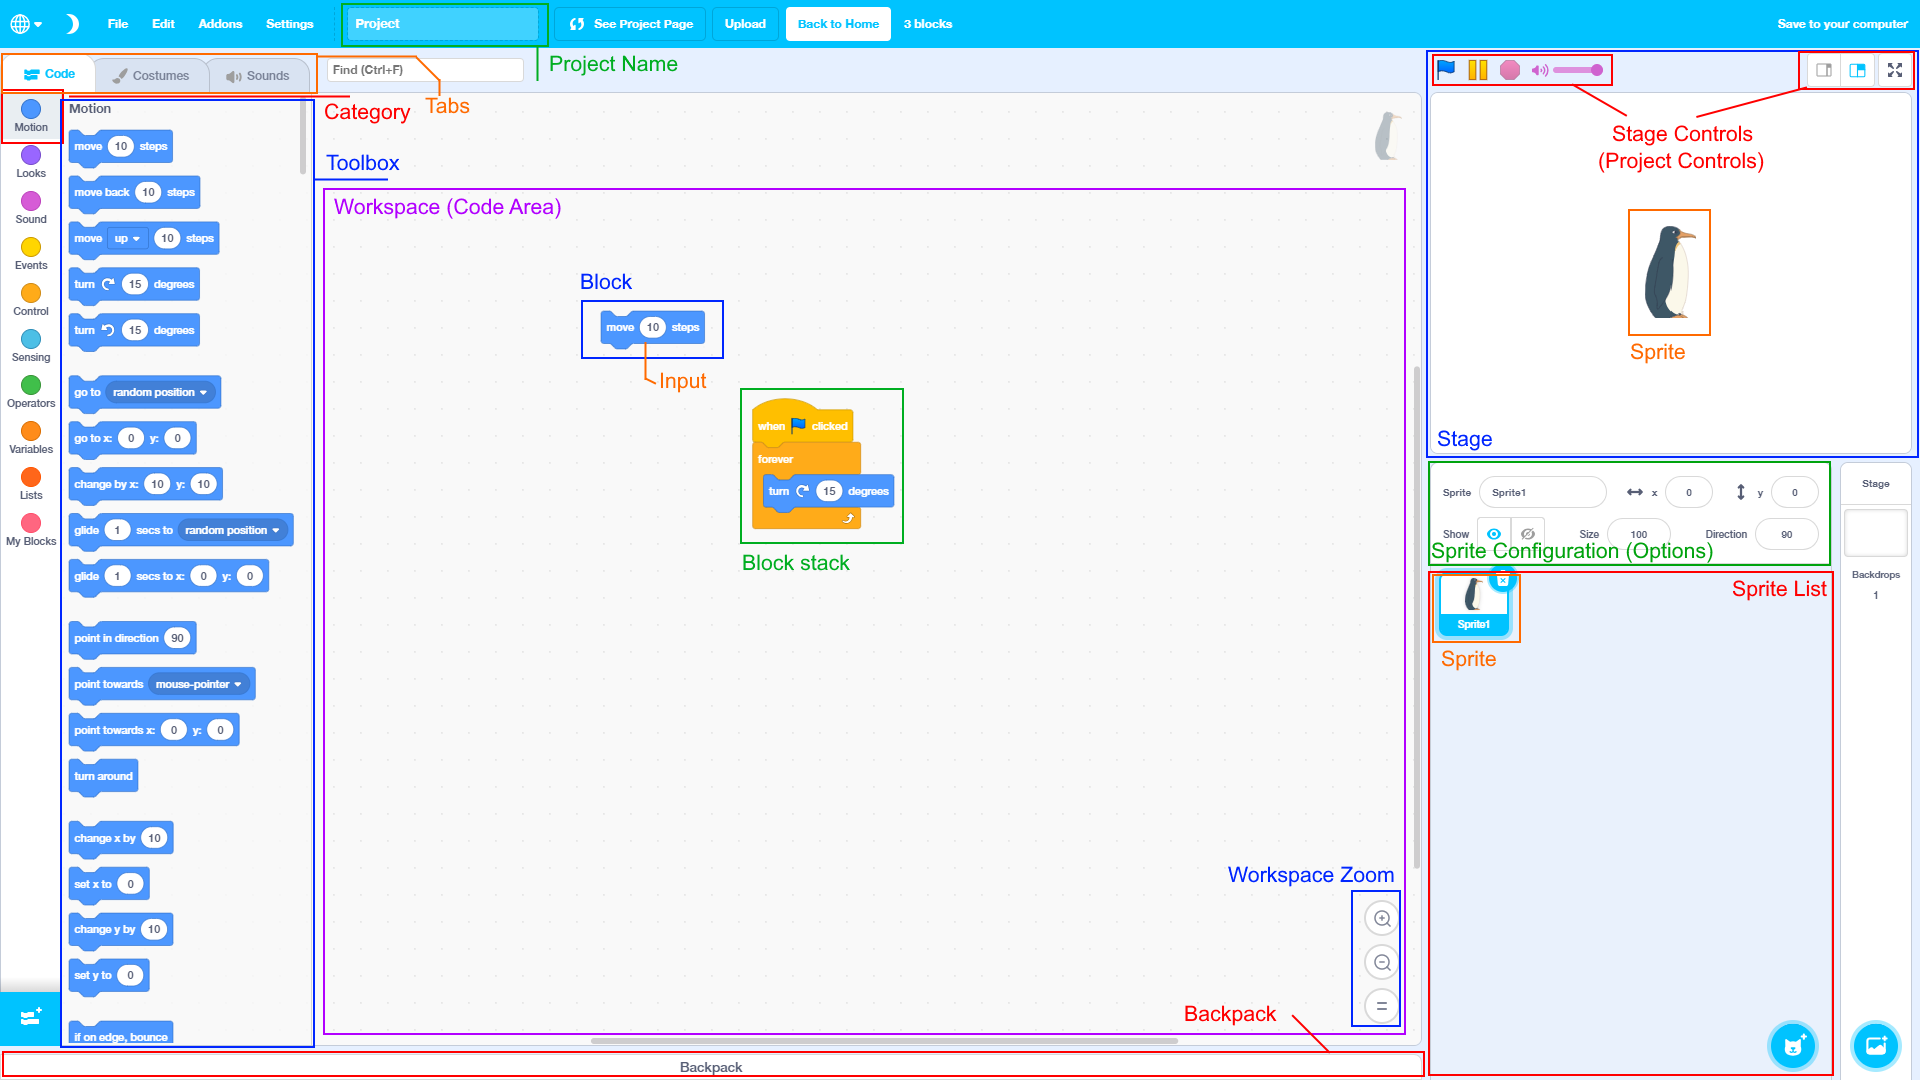
The Toolbox
The Toolbox is the menu on the left that allows you to place individual blocks onto the Workspace in the center.
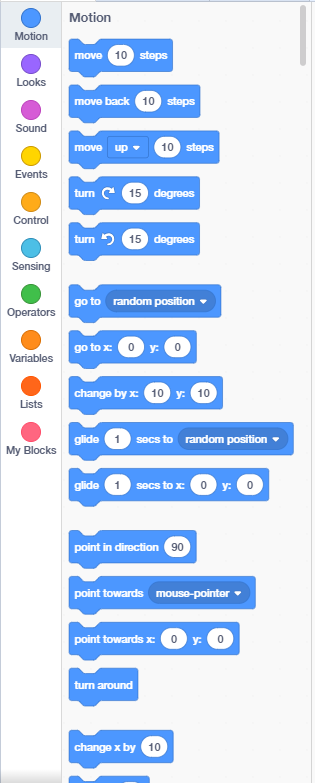
Click and drag a block from the Toolbox, then release the mouse on the Workspace to place a block there.
Categories
Categories are individual sections of the toolbox that contain groups of blocks.

Each category has blocks related to the name of the category:
- Motion: Blocks related to moving & rotating the Sprite
- Looks: Blocks related to the visual look & style of the Sprite or parts of it
- Sound: Blocks related to playing or modifying sounds
- Events: Blocks that run when certain things happen in the project, or run other events
- Control: Logical blocks that allow you to control how a block stack runs or ends
- Sensing: Blocks related to sensing things on the screen, things about sprites, or sensing devices on the computer
- Operators: Blocks related to mathematical operations, modifying text, mechanical operations, etc
We'll return to Variables, Lists, and My Blocks later.
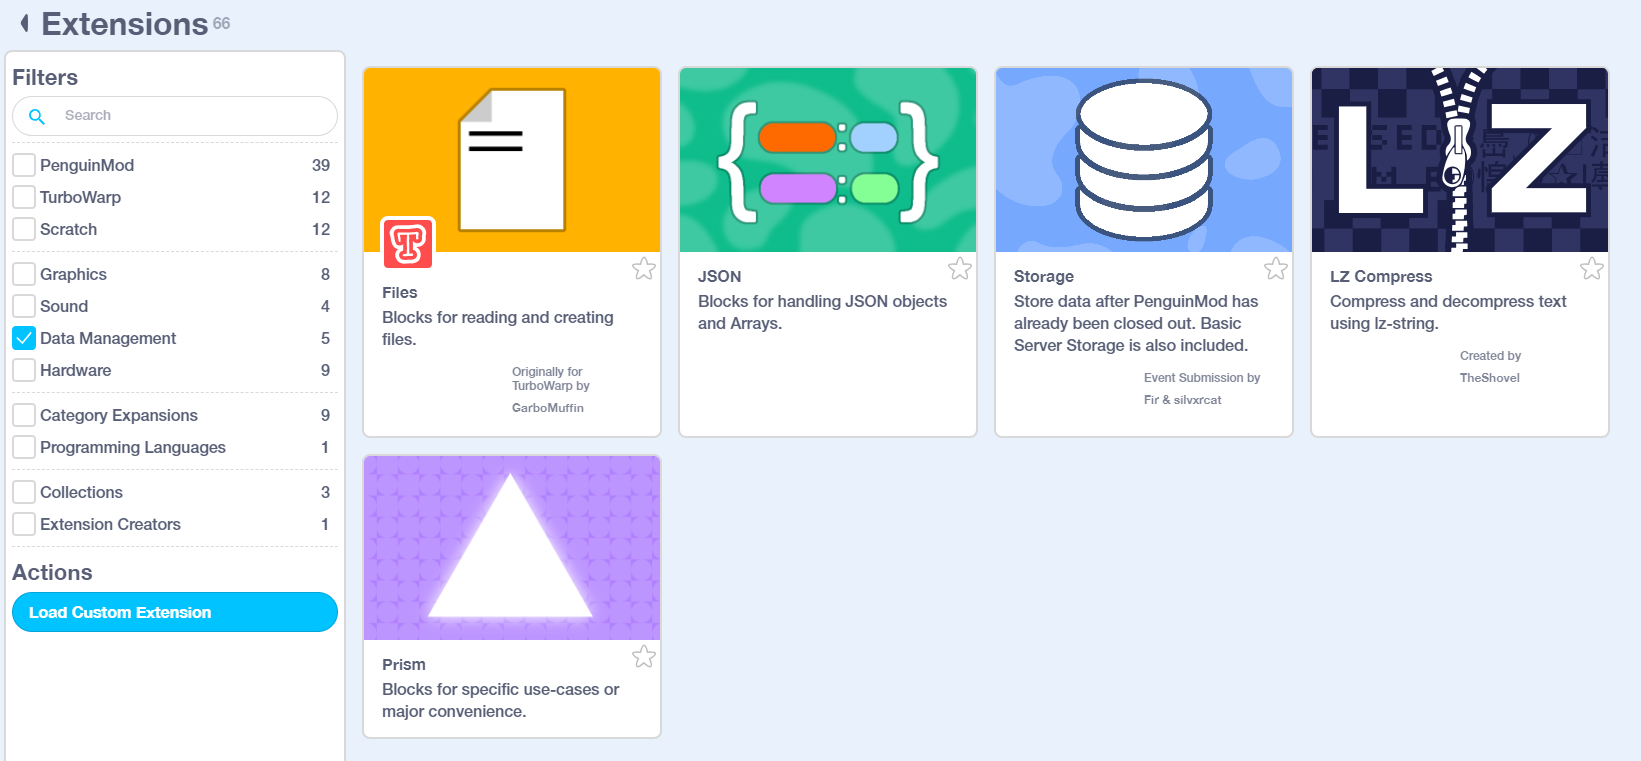
Extensions
Extensions are various new categories you can import in your project if your project needs them.
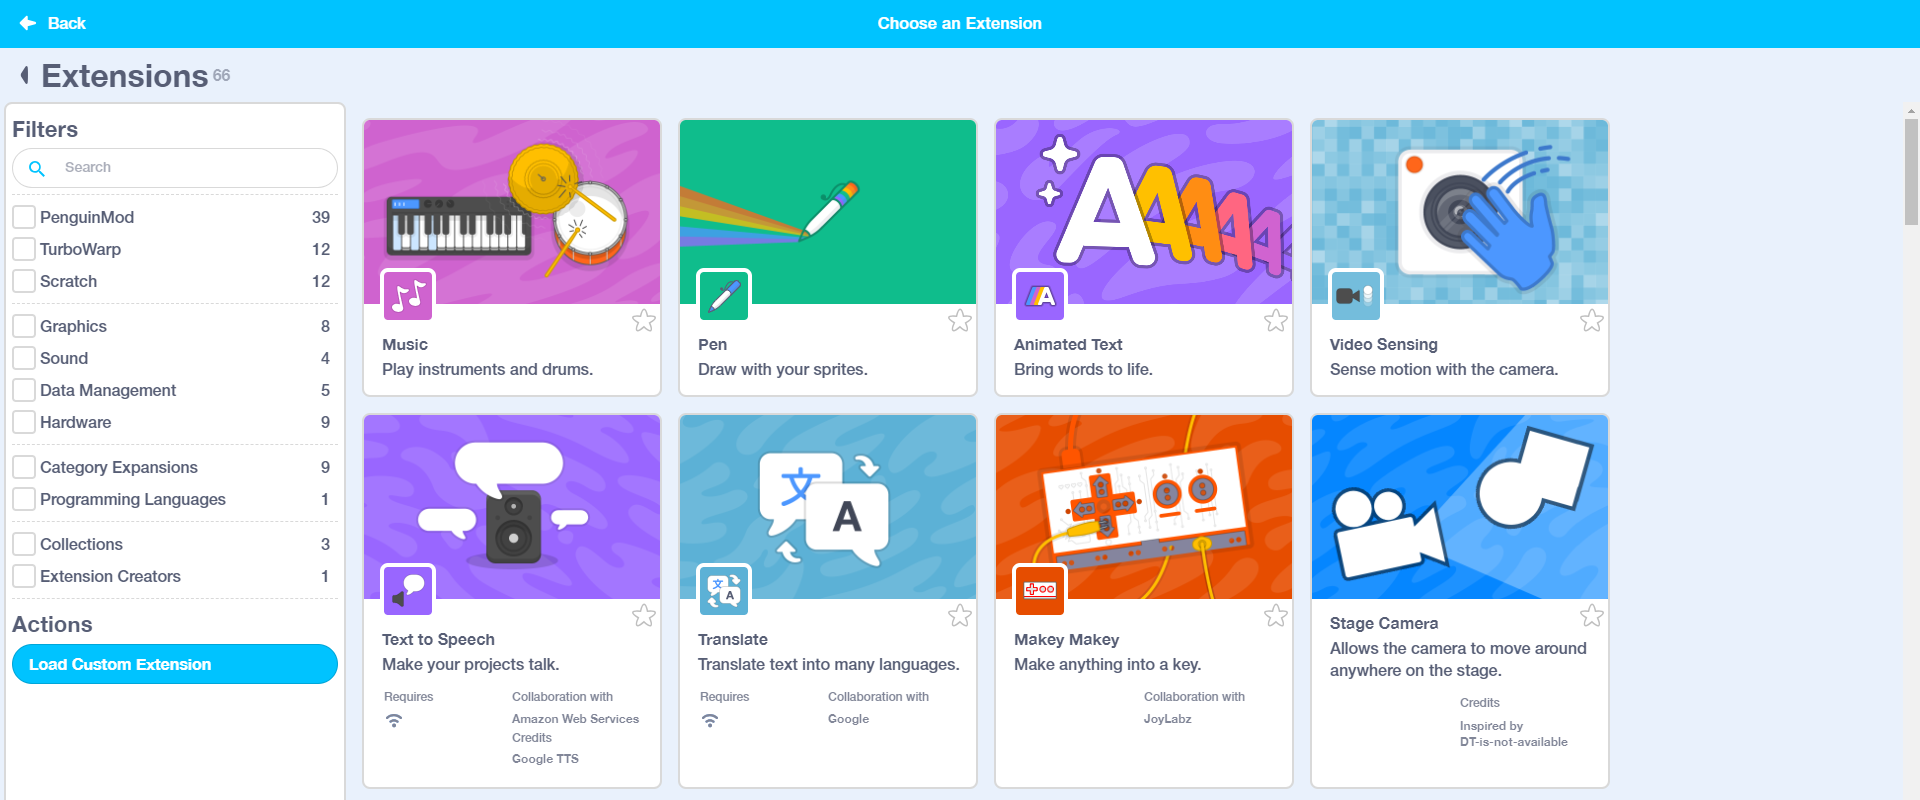
Most simple projects will not require the use of any extensions, but extensions allow for additional functionality in your projects.
You can access this menu by clicking the button with the blocks and a plus at the bottom of the toolbox.

Clicking the category filters on the left will allow you to filter out extensions that you aren't looking for.
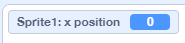
Monitors
Click the checkbox next to certain blocks in the toolbox to show a monitor for it.
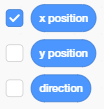
A monitor will appear on the stage, which shows the value of the block that has it's monitor enabled.
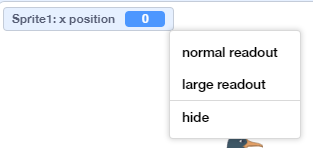
You can right-click on a monitor to change it's look or hide the monitor again.
Dragging a monitor will also move it around on the stage.
The Workspace
The workspace is where you will place blocks in your project to make things happen in the project.
Drag a block from the Toolbox onto the Workspace to add blocks.
You can drag the block around the Workspace to move it, or drag it back onto the Toolbox to delete it.
Connecting blocks on the top or bottom of another block will create Block Stacks, and spots to place blocks inside of other blocks can be known as Inputs, or Arguments.
Note: Block Stacks are commonly referred to as Scripts.
Shortcuts
View the list of editor shortcuts here.
Right-click menu
Right-clicking on an empty part of the workspace will open this menu:
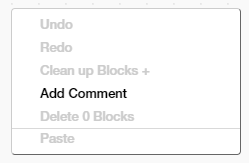
You might see different options if you have other blocks on the workspace, custom extensions, or addons.
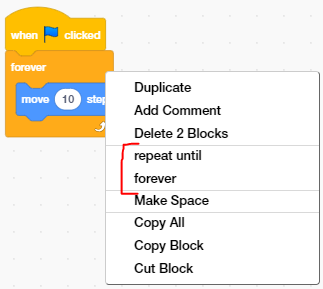
Right-clicking on a block will show different menus based on what the block is, and what addons you have enabled.
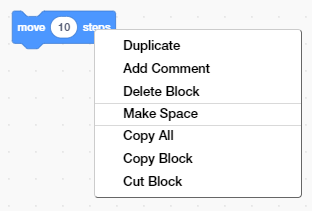
Right-clicking certain blocks with the Block switching Editor Addon (enabled by default) will show options to switch it with another block:
Comments
Adding comments on the Workspace or other blocks will create a small note where you can type any information you want.
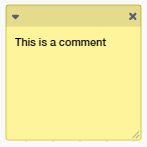
- Clicking the arrow on the top of a comment will minimize the comment
- Clicking the X icon on the top of a comment will delete the comment
- Dragging the dashed lines at the bottom right of a comment will resize the comment
- Dragging the top bar of a comment will move the comment around on the workspace
The Stage
The stage is the area where sprites and backgrounds will appear in the project.
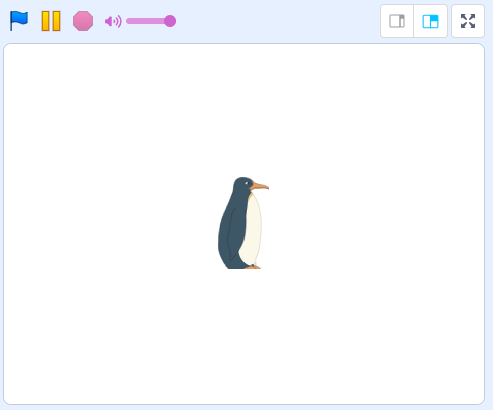
Drag a sprite on the screen to move it somewhere else. (Enable the Non-draggable sprites in editor addon to change this behavior.)
- Clicking the Blue Flag acts like starting the project, resetting Sprite effects,
resetting clones and activating
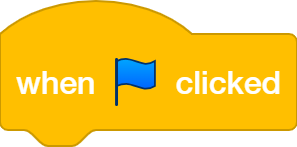 event blocks
 - Clicking the Pause icon will pause all blocks and sounds in the project
- Clicking the Stop icon will stop the project, resetting Sprite effects,
deleting clones and activating
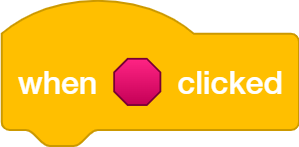 event blocks
You can click the outwards-pointing arrows button to enter a fullscreen mode, or click the buttons next to it to scale down the stage in the editor if it takes up too much space.
Selecting the stage sprite
Next to the Sprite list, the Stage is selectable on the right side.
Selecting the stage will disable certain categories if the stage cannot use any blocks from them:
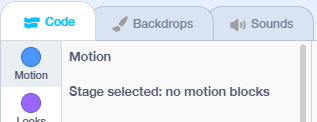
The Stage also replaces Costumes with Backdrops, acting as a background to the project.
The Sprite List
The Sprite List is a grid list of the sprites inside the project.
Hovering over the blue button in the bottom right will allow you to import or draw a sprite.
What actually is a Sprite?
A Sprite is an object that has Costumes to determine how it looks, has Block Code to determine what it does, and has Sounds to determine the noises it can make.
Block code can switch to different sprite costumes, move the sprite around, resize the sprite, play sprite sounds, etc.
The Backpack
The Backpack is a menu at the bottom of the editor where you can store Sprites, Costumes, Sounds, or even Block stacks.

Content inside the backpack is accessible for other projects you may create.
Backpacks in PenguinMod save to your computer. If you switch browsers or clear your browsing data, you may lose your backpack.
As of now, including a Custom Extension in Code or Sprites inside your backpack may cause unexpected behavior. Try loading extensions inside the code or sprites before trying to import the content from your backpack.
Restore Points
Restore Points are an auto-saving feature in PenguinMod in the case you forgot to save your project.
Do not rely on Restore Points for saving as they may be randomly deleted by your computer or browser. If you switch browsers or clear your browsing data, you may lose any restore points you had.
You can save your projects to a file by clicking "Save to your computer" in the top right when you make changes.
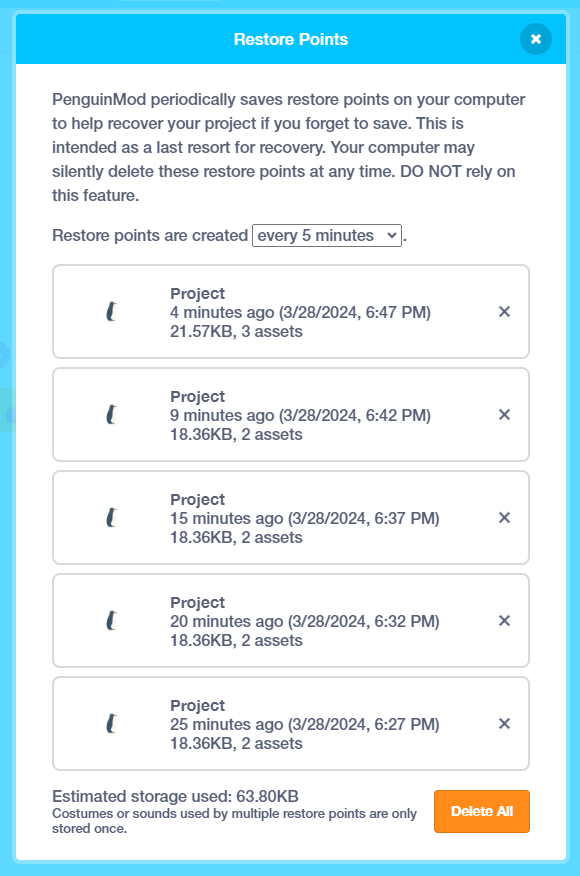
You can change the auto-save period between when Restore Points are created in this menu, or delete all existing Restore Points.
Clicking on a Restore Point will confirm if you'd like to load the project from that Restore Point.
It is recommended to configure this auto-save period to your liking depending on how long you spend in the editor, how often you save, and how often you load other projects.